BUILDING YOUR SOLAR BACKUP-POWER SOLUTION: A BEGINNER'S GUIDE


For one who is new to the world of solar energy, it may seem a daunting task to set up an off-grid back-up power solution for your home. To make things easy, using a simple example, we have summarised how to go about proceeding with your off-grid power setup.
Part 1: Analysing your loads to estimate usage and determining the size of your inverter.
Example: Anita Simbotwe is facing the challenges of load-shedding. She has decided to invest in a back-up off-grid power solution to ease her suffering. Anita requires back-up power enough to run the below loads for approximately 5 hours.
Required: a) Know and list your loads.
b) Check the Wattage rating of your loads.
c) Load Quantity x Wattage rating will give you the estimated usage by each of your loads every hour.
d) The solar system itself (inverter, power resistance in cables etc.) will require/lose some power to run. Add an approximately 20% Allowance to account for this loss.
|
Estimated |
Load |
Estimated |
Estimated |
|
Loads |
Qty |
Wattage Rating |
Load per hour |
|
Energy-Saver 4FT LED Tube Lights |
3 |
18W |
54Wh |
|
Energy-Saver 8W LED Bulbs |
9 |
8W |
72Wh |
|
Electric Stand Fan |
2 |
50W |
100Wh |
|
43" Energy-Efficient LED T.V |
1 |
65W |
65Wh |
|
T.V Decoder |
1 |
20W |
20Wh |
|
Energy-Efficient Upright Fridge (~250 Net Lts) |
1 |
50W |
50Wh |
|
Energy-Efficient Chest Freezer (~200 Net Lts) |
1 |
95W |
95Wh |
|
Sum of Loads |
|
|
456Wh |
|
Add 20% Efficiency Loss Allowance |
|
|
570Wh |
With the above calculation, Anita has identified that she requires an inverter with enough capacity to support 570W.
Anita therefore decides to buy a suitable inverter enough to cover her required 570W. She opts for the Fortuner Hybrid 12V 600VA Inverter.
Anita has also opted for the Fortuner Hybrid 12V 600VA Inverter as it supports both electricity-grid charging and solar-panel charging.
Note: Some inverters support only electricity-grid charging (referred to on Radian Online as Standard Inverters). Some inverters support both electricity-grid charging and solar-panel charging (referred to on Radian Online as Hybrid Inverters), while some inverters do not have a built-in battery charger at all (Referred to on Radian Online as Modified Sine Wave Inverter). Those require a separate electricity-grid battery charger or a solar panel charging system via a solar charge-controller.
Part 2: Calculating the Battery Bank size
Anita needs to ensure that she has enough reserve battery capacity to get her through her required 5 hours.
Required: a) Know the sum of Watt-hours utilised by your loads. To get this, multiply: Sum of loads x Number of backup hours required. 570W x 5hrs = 2,850Wh
b) Divide the Sum of Watt-hours by the inverter’s rated voltage (In Anita’s case: 12Volts). 2,850Wh/12Volts = 237.5Ah
c) Batteries lose power due to temperature and as they age. Add a 20% Allowance for this loss. 237.5Ah/0.8 = 297Ah
d) Finally, identify how many batteries you need and how you will wire them to achieve the target Amp-hours (In Anita’s case: 297Ah. With round up: 300Ah) and to match the inverter system’s voltage (In Anita’s case: 12Volts).
Note: As a simple guide – Connecting batteries in series increases Voltage, Amp-hours remains the same. Connecting batteries in parallel increases Amp-hours, Voltage remains the same.
With the above calculation, Anita has identified that she requires a battery bank with enough capacity of 300Ah and wired to give her 12Volts output.
Anita therefore decides to get:
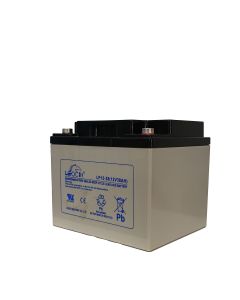
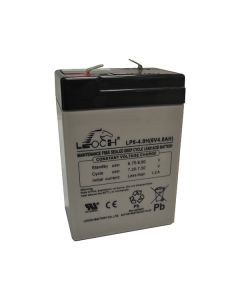
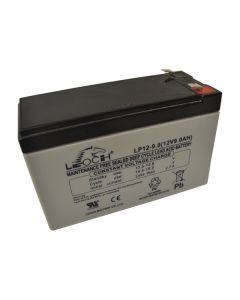
2 x Leoch AGM Deep Cycle 150AH 12Volt Batteries.
She connects them in Parallel to get 300AH, 12Volt output.
Part 3: Calculating the size of the solar panel array
The basic aim is to replace the amount of power consumed from the battery bank each and every day. So, based on Anita’s example above, we need to try and replace 300Ah every day; i.e. Anita’s solar panels need to generate this power.
Required: a) Know the number of sun-light hours in your area. In Anita’s area, she gets 8 hours of sunlight
b) Divide your battery bank size (In Anita’s case: 300Ah) by the amount of sunlight hours expected. 300Ah/8hrs of sunlight = 37.5Wh
c) Multiply the answer in (b) by the system voltage (In Anita’s case: 12Volts). 37.5W x 12Volts = 450Wh.
d) If solar panels will only be 80% efficient (due to cloudy weather, temporal shading etc.). Add a 20% Allowance for this loss. 450Wh/0.8 = 563Wh.
e) Finally, identify how many solar panel’s you need and how you will wire them to achieve the target Watt-hours (In Anita’s case: 563Wh. With round up: 600Wh) and system voltage (In Anita’s case: 12Volts).
Note: As a simple guide – Connecting solar panels in series increases Voltage, Watt-hours remains the same. Connecting solar panels in parallel increases Watt-hours, Voltage remains the same.
With the above calculation, Anita has identified that she requires solar panels with enough capacity to generate 600Wh and wired in a way to give her 12 Volts output.
Anita therefore decides to get:
4 x ThunderBolt 12V 150W Poly Solar Panel
She connects them in Parallel to get 12Volt, 600Wh output.
Part 4: Putting it all together
In Summary, to allow Anita:
- run the below-mentioned loads
- for approximately 5 to 6 hours
|
Loads |
Qty |
|
3 |
|
|
9 |
|
|
2 |
|
|
1 |
|
|
1 |
|
|
1 |
|
|
1 |
The following are the main components she requires:
- 1 x Fortuner Hybrid 12V 600VA Inverter
- 2 x Leoch AGM Deep Cycle 12V 150AH Batteries (Connected in Parallel for 12V 300AH output)
- 4 x T-Bolt 12V 150W Poly Solar Panels (Connected in Parallel for 12V 600W output)
Other components she will/may require for her to fully connect her system:
- 1 x 4-Gangway Extension Socket – To give her socket outlets from which to connect her loads.
- 2 x 10mm Stranded Cable - 0.5 meter – To create jumpers for her batteries so as to wire her batteries in a 12Volt, 300AH output configuration.
- 2 x Pairs of 10-8mm Lugs – To put at the ends of her battery jumpers which allows for stable battery power distribution and reduces oxidization on the battery terminals.
- 3 x Pairs of MC4-T Solar Panel connectors – To allow her setup an array out of her solar panels so as to give her 12Volt, 600Wh output configuration.
- 1 x 5m Solar PV Extension Cable – To carry the power from where her solar panel array is installed outdoors to her inverter which is indoors.
Note: In many cases, these are either listed for you for purchase by your solar technician after assessment or provided by solar installation companies as part of their installation fee.
In conclusion, what has been prepared above is an advisory calculation guide created to help beginners understand how to begin setting up their solar-power back-up system.
In this calculation, ideal scenarios (as recommended by experts in the solar industry) have not been accounted for such as: discharging the battery bank at 50% Depth of Discharge, upsizing the battery bank for unexpected longer power outages, inverter surge power allowance for reactive loads such as fridges/freezers, upsizing the inverter for future unexpected loads, cable sizing and type of solar panels, solar panels setup at the correct ideal angles based on location, trunking for cables, racking for solar panels, racking for batteries etc.
We hope this will be helpful to you! Get in touch with us for further assistance.
Related Products